How to Take a Sample
Skip to section:
- How to Take a VOC Sample
- How to Take a Phase I, II, V Sample
- How to Take a Bacti Sample
- How to Take a Distribution Chlorine Sample
- How to Take a Lead and Copper Sample
How to Take a VOC (Volatile Organic Chemical) Sample Properly
View printable VOC sampling instructions
Sometimes water samples show contaminants because of a sampling error. To ensure that this does not happen, follow these steps when taking the VOC samples from your water system.
Step 1

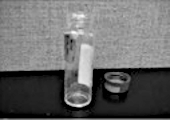
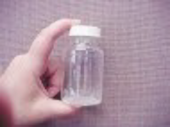
Get a Sample Kit From Your Lab – One vial will be labeled “Trip Blank.” You do not need to do anything to it except send it back to the lab with your test kit water. If the system chlorinates, a brown bottle may also be in the kit.
Step 2
Where Do You Take The Sample? – The sampling point should be a tap faucet, after the treatment system if one exists. Make sure you select an area free from gasoline or diesel fuel fumes.
Step 3

Do Not Rinse Out The Vials – There is a small amount of acid in the sample vials and brown bottle. Do not rinse it out, it is meant to be there. The brown bottle is used to neutralize the chlorine before you fill the vials.
Make sure you keep all the vials together the whole time you are taking your samples. The samples must be sent to the lab immediately.
Step 4
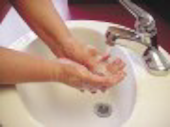
Do Not Touch the Inside of the Vial or Cap – Make sure you are wearing clean clothes free of grease, fuel or oil stains. Remember to wash your hands before and after you take the sample.
Step 5
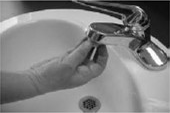
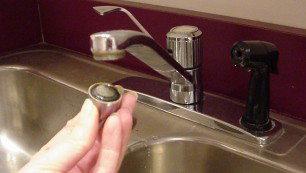
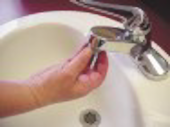
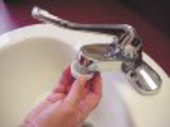
Prepare the Faucet. Remove the screen, hoses or aerators from the faucet. These devices can put air in the water that will regroup into bubbles during shipping and make the sample unusable.
Step 6
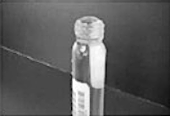
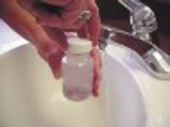
If there is a brown bottle in the kit, fill it with cold water, cap and shake the bottle, use the water from the brown bottle to fill the vial; otherwise fill the vials with cold water from the faucet until it is slightly overfilled. The water should end up in a mound shape above the rim of the vial. Screw the cap on tightly.
Step 7

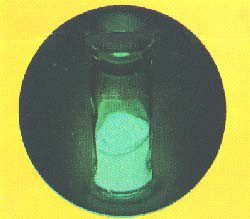
Check for Air Bubbles. Turn the vial over and tap the cap on a hard surface. There should not be an air bubble in the sample. If there is an air bubble, unscrew the cap and add more water.
The sample will not be usable if there is an air bubble in the sample. You will have to resample.
Step 8
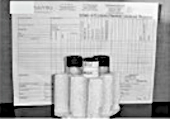
Fill Out the Paperwork – Keep a copy for your files. Pack the sample in a styrofoam container or bubble wrap so the vials do not break. Ship it in to the lab immediately.
Keep the sample cool by placing samples in a cooler with an ice pack. Do not freeze.
Contact DEC Spill Prevention and Response staff in the event of a contaminant (fuel or solvent) spill.
Anchorage: 269-3063; Juneau: 465-5340; Fairbanks: 451-2121
or if the spill occurs after business hours call 1-800-478-9300.
Increased sampling may be required to monitor possible contamination from improper containment measures or a fuel spill.
Read more about VOCs
Volatile Organic Compounds (VOCs) Overview
 Volatile Organic Chemicals (VOCs) refers to a group of organic compounds that are usually derived from fuel products or solvents. Currently, there are 21- regulated VOCs for which Community Water Systems (CWS) and Non Transient Non Community Water Systems (NTNCWS) must monitor. The regulated VOCs include: benzene, toluene, xylene, carbon tetrachloride, and other compounds. VOCs may cause both short and long term health problems at levels above the health standards set by the US EPA. Many of these compounds are known or suspected carcinogens which may contribute to an increased risk of some types of cancer if a person is exposed to them over long periods of time.
All CWS and NTNCWS's are required to monitor for VOC's. Systems that use surface water are required to monitor annually. Most systems that use groundwater are required to monitor every three years. If any of the regulated VOC levels is higher than 0.5 ppb, the system begins quarterly monitoring to track levels and movement of the compounds over time. If any regulated VOC exceeds the Maximum Contaminant Level (MCL), the system must treat the water to remove or reduce the contamination. Granular activated carbon (GAC) adsorption and aeration are the most commonly used treatment methods for removing VOCs from water. It is very important for communities and water system owners to plan ahead and implement a program to protect their drinking water source from VOC contamination.
Contamination can come from leaking fuel storage tanks (above and below ground), and improper storage and disposal of solvents, paints and paint thinners. Aerosol containers may also leak and contaminate a drinking water source. Proper containment and monitoring measures should be implemented for fuel storage areas and landfills. If a spill or leak does occur, it should be reported to DEC right away so that measures can be taken to protect the drinking water source.
Maximum Contaminant Levels (MCL) of Volatile Organic Contaminants for Drinking Water
| 1,1-Dichloroethylene | 7 ppb |
| 1,1,1,-Trichloroethane | 200 ppb |
| 1,1,2-Trichloroethane | 5 ppb |
| 1,2-Dichloroethane | 5 ppb |
| 1,2-Dichloropropane | 5 ppb |
| 1,2,4-Trichlorobenzene | 70 ppb |
| Benzene | 5 ppb |
| Carbon tetrachloride | 5 ppb |
| cis-1,2-Dichloroethylene | 70 ppb |
| Dichloromethane | 5 ppb |
| Ethylbenzene | 700 ppb |
| Monochlorobenzene | 100 ppb |
| o-Dichlorobenzene | 600 ppb |
| p-Dichlorobenzene | 75 ppb |
| Styrene | 100 ppb |
| Tetrachloroethylene | 5 ppb |
| Toluene | 1,000 ppb |
| trans-1,2-Dicholoroethylene | 100 ppb |
| Trichloroethylene | 5 ppb |
| Vinyl Chloride | 2 ppb |
| Xylenes | 10,000 ppb |
| NOTE: (ug/L is 1 ppb) |
How to Take Phase II/V Inorganics, Gross Alpha & Nitrate Samples Properly
View printable inorganics sampling instructions
Sometimes water samples show contaminants because of a sampling error. To ensure that this does not happen, follow these steps when taking samples for Gross Alpha, Nitrates and Phase II & V Inorganics from your water system.
Step 1
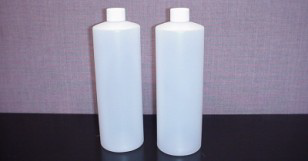
Get a Sample Kit From Your Lab – Contact the lab for sample bottles. The lab will send the proper plastic sample bottles for collecting the samples.
Step 2
Where Do You Take the Sample? – The sampling point should be a tap faucet, after any existing treatment.
Step 3
Prepare the Faucet – Remove the faucet screen or any other hoses or aerators from the end of the faucet.
Step 4
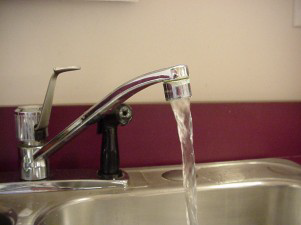
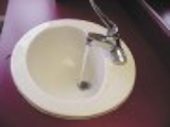
Flush the Water – Run the cold water gently for about 2 minutes to flush the line. Reduce the flow.
Step 5
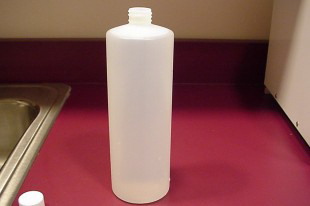
Take the Sample – Fill the bottle with cold water to the shoulder and turn off the water. DO NOT overflow the bottle. Tightly cap the sample bottle.
Step 6
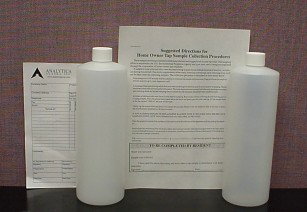
Fill Out the Paperwork – Pack the samples in a cooler or box. Ship it in to the lab as soon as possible. Keep a copy of the paperwork for your files.
Keep the sample cool by placing samples in a cooler with an ice pack. Do not freeze.
Read more about inorganic contaminants
Inorganic Contaminants - Phase II/IV & Nitrate
 Inorganic contaminants refer to a group of compounds that can be either naturally occurring in the environment or can come from activities such as agriculture or manufacturing. There are 15 inorganic chemicals that are regulated in drinking water by the Alaska Department of Environmental Conservation (ADEC) Drinking Water Regulations, 18 AAC 80. The regulated inorganic contaminants are: antimony, arsenic, asbestos, barium, beryllium, cadmium, chromium, cyanide, fluoride, mercury, nitrate, nitrite, selenium, and thallium. Most inorganic contaminants are found in the environment as part of natural ore deposits or metals. As water travels in streams, rivers or over the land and through the soil or rock, it can dissolve these compounds. The compounds can also be used in many manufacturing processes, as well as in agricultural activities. Most of these metals are harmless in low amounts, but they can be potentially harmful if they are present in concentrations greater than the Maximum Contaminant Level (MCL) set by EPA in the National Primary Drinking Water Standards.
 ADEC requires all Community and Non-Transient Non-Community Water Systems to test for inorganic contaminants on a periodic basis to ensure that none of the contaminant concentrations exceed the MCL. Inorganic contaminants can cause a variety of health effects if they are present in drinking water in levels exceeding the MCL. Health effects can be either acute or chronic. Acute health effects are those effects that occur almost immediately, within hours or days of the time a person is exposed to the contaminant. Acute health effects caused by drinking contaminated water are usually due to microorganisms, such as bacteria, viruses or parasitic protozoa. Chronic health effects are those effects that occur when a person is exposed to a contaminant over a long period of time, usually years. While almost any contaminant can cause acute health effects if a person is exposed to extraordinarily high amounts, the most common health effects of inorganic contaminants are chronic. Chronic health effects caused by inorganic contaminants are usually systemic and include: nervous system disorders, kidney or liver damage, cancers and cancerous tumors, circulatory system problems, and skin disorders.
 The only regulated inorganic contaminant considered to be an acute contaminant is nitrate. Nitrates can be in either an organic or inorganic form. Most organic nitrates come from human sewage or animal manure. Inorganic nitrates primarily come from fertilizers, such as potassium nitrate or ammonium nitrate. Both forms of nitrate are very soluble and can enter the groundwater easily. The MCL for nitrate is 10 mg/L (ppm). High levels of nitrate can cause serious illness, and sometimes even death, in small children. Methemoglobinemia, blue-baby syndrome, can occur if infants consume water or baby formula made with water contaminated with high levels of nitrate. When nitrate is consumed, it is converted to nitrite in the stomach by bacteria. Methemoglobinemia is a condition that occurs when hemoglobin in the blood is converted to methemoglobin by nitrite. Hemoglobin carries oxygen to cells in the body.
Methemoglobin cannot carry oxygen as well, so the baby can be deprived of oxygen and turn blue. All Community and Non -Transient Non-Community Water Systems are required to test for nitrate on an annual basis. There are no waivers available for nitrate. If the level of nitrate in drinking water exceeds the MCL, the PWS would be required to provide treatment to remove nitrate. Ion Exchange, Reverse Osmosis and Electrodialysis are treatment methods that are approved and effective for nitrate removal.
Maximum Contaminant Levels (MCL) of Inorganic Contaminants for Drinking Water
| Antimony | 0.006 mg/L |
| Arsenic | 0.01 mg/L |
| Asbestos | 7 MF/L |
| Barium | 2 mg/L |
| Beryllium | 0.004 mg/L |
| Cadmium | 0.005 mg/L |
| Chromium | 0.1 mg/L |
| Cyanide | 0.2 mg/L |
| Fluoride | 4.0 mg/L |
| Mercury | 002 mg/L |
| Nitrate | 10 mg/L |
| Nitrite | 1 mg/L |
| Selenium | 0.05 mg/L |
How to Take A Total Coliform Bacteria Sample Properly
View printable coliform sampling instructions
Sometimes water samples fail a total coliform bacteria test because of a sampling error, not because the water system is actually contaminated. To ensure that this does not happen to you follow these steps when taking a coliform sample from your water system.
Important!
If you're in a remote area, make sure you know the flight schedule and verify that the flight will be in.
Take the sample as close to the departure time as possible.
The lab must receive the sample when they are open and within 30 hours of collection.
Step 1
Do not rinse out the bottle. The powder in the bottle is meant to be there and will not contaminate your sample.
Step 2
Wash your hands prior to taking the sample. Then remove the sterile strip from the bottle.
Step 3
Remove faucet screen or other hoses or aerators from the end of the faucet. If possible avoid using a faucet that swivels.
Step 4
Disinfect the faucet by dipping the end in a cap full of bleach before running the water. This is optional but is a good idea.
Step 5
Run the cold water long enough to ensure that the water you are sampling has not been sitting in the pipes or tanks for a long time.
Step 6

Turn the water down so it does not splash. Fill the bottle to at least the fill line (100ml). Do not fill it all the way up to the top, allow 1” head space.
Step 7
Screw the cap on tightly. Take special care not to touch the inside of the cap or bottle. If you do, start with a new bottle.
Step 8

Fill out paperwork and mail it with the sample. Keep a copy for your files. Pack the sample in a Styrofoam container or bubble wrap so the bottle doesn't break.
Keep the sample cool by placing samples in a cooler with an ice pack. Do not freeze.
Read about waterborne disease outbreaks
Waterborne Diseases and Boil Water Notices
Waterborne Disease Outbreaks (WBDO’s) occur when drinking water becomes contaminated by microbial pathogens or chemicals. Typically, WBDO’s are caused by microbial pathogens, such as bacteria, viruses, or protozoans. These pathogenic organisms are transmitted via the fecaloral route. This means that the drinking water supply has somehow been contaminated by fecal material from humans or other warm blooded mammals. The most important test used to determine if drinking water has been contaminated by disease-causing organisms is the total/fecal coliform bacteria test. Coliform bacteria are present in the intestinal tracts of all warm blooded mammals and are good indicators of fecal contamination. If coliform are found in a water sample, it is possible that pathogenic organisms could also be present. It is important for public water systems to protect their source water from possible contamination sources, maintain treatment systems, including filtration and chlorination, and to routinely test the finished water for total/fecal coliform bacteria. If total coliform bacteria are detected in a sample, the PWS is required to conduct increased sampling to determine the extent and possible cause of the contamination. If fecal coliform are detected, it is called an “acute” violation and the system will be put on Boil Water Notice.
The May 2000 WBDO in Walkerton, Ontario, illustrates the need for operators, public utility managers, and state drinking water officials to remain vigilant at all times. In this outbreak, the public water supply was contaminated by the bacteria 0157:H7. This pathogenic strain of E. coli serotype E. coli causes severe diarrhea and in some cases, kidney failure. Thousands of people may have been infected in Walkerton and fourteen deaths were under investigation at the time of the outbreak. It appears that proper response to the positive coliform tests could have reduced the harm. This case illustrates the importance of reporting all positive coliform tests to the ADEC immediately and the necessity for ADEC staff to take immediate action by issuing BWN's as needed, requiring additional samples, and requiring the water system to investigate possible causes of contamination. By routinely testing for coliform and responding immediately to positive coliform tests, we can greatly reduce the probability of a WBDO occurring in an Alaskan Public Water System. By working together, we can help to ensure the safety of the drinking water in our communities.
How to Take a Distribution Chlorine Sample Properly
View printable chlorine sampling instructions
The reason you need to take a Distribution Chlorine Residual sample is to ensure that your system has enough chlorine in the treatment system to properly continue to disinfect the distribution system.
Where do you take the sample?
The sample must be taken within the distribution system of your PWS. If you take it before the distribution system you will not get an accurate reading. The sample must be taken at the same tap that you take the Bacti sample.
When are you supposed to take the sample?
The sample must be taken at the same location and time as the Bacti sample.
Why?
The free Chlorine Residual in the distribution system provides additional protection against waterborne diseases should contamination enter the distribution system. It also tells you if you have used enough chlorine to make sure that the initial treatment is sufficient. If there is no residual, then whatever was added for treatment was completely used up and there was not enough chlorine to complete the disinfection process.
How?
Chlorine Residual samples cannot be stored or transported. They must be tested within 10 minutes of collection. You should use a HACH Chlorine Test Kit with a DR spectrophotometer or the Color Comparator method. If you use the spectrophotometer, check to see that you’re in the proper mode (for residuals in the 0- 2.00 mg/L use the low range check to change modes-consult the manual when in doubt).
HACH Chlorine Test Kit: Fill the container with 10 ml of sample. Add the DPD reagent (free powder pillow, not the total pillows). Screw on cap and shake. Place the sample in the instrument, making sure the outside of the sample bottle is free of any liquid or dirt. Arrange the sample bottle so that the white diamond is facing you. Within one minute after adding the reagent place the mixed sample into the cell holder. Place the instrument cap over the sample, the cap should fit snugly. The results will appear shortly and are given in mg/L.
Color Comparator: Clean comparator cells periodically with hot soapy water and a soft brush, rinse with distilled water, and drain dry. Rinse the cell with the sample each time you use it. Place 5 ml of sample in the left hand cell. Place 5 ml of sample in the right hand cell. Add contents of powder pillow to right hand cell. Put in the stoppers and stir by swirling. Wait 30 seconds and read color within one minute. Read the test results on the scale at the bottom of the comparator. Rinse each tube twice with distilled water and drain to be ready for the next sample.
How to report the Distribution Chlorine Residual Result
The result needs to be put on both the Operator Report and on the paperwork that is submitted to the lab with the Bacti sample. You may put the chlorine residual results anywhere on the lab submittal form; the lab will forward the information to the DW Program with their report.
Where do you write your results?
Please report your results on the operator form in the space provided, and write neatly, please.
Always make sure the sample is taken at the same time and location you take your Bacti Sample.
How to Take a Lead and Copper Sample
View printable lead and copper sampling instructions
Important!
If any plumbing repairs or replacements have been done in the home or building since the previous sampling event, the water system operator must be contacted prior to sampling to determine if an alternative sample site needs to be established.
Samples may be collected either by an employee, operator or the customer, making sure that the proper sampling protocol is always followed. Samples must be collected after the water has stood motionless in the line for at least six hours. A good way to do this is to collect samples either early in the morning or in the evening upon returning from work. Samples collected from a residence must only be collected from the cold-water kitchen tap or the cold-water bathroom sink tap. Nonresidential samples must be collected from interior taps that are regularly used for drinking water consumption. Samples collected from other taps, such as outside spigots, lab sinks and mop sinks, are not acceptable for lead and copper monitoring.
- Each sample must specify the
- address
- tap type and location
- date
- time
- and must document that the samples were first-draw and stood motionless in the line for at least six hours.
- Use a kitchen or bathroom cold-water faucet for sampling. If you have a point of use filter on your kitchen tap, collect your sample from the bathroom tap that is not attached to the point of use device if possible.
- There must be a minimum of 6 hours during which there is no water used from the tap where the sample will be collected and any taps adjacent or close to that tap. Either early mornings or evenings upon returning home are the best sampling times to ensure that the necessary stagnant water conditions exist. Note the length of time that the tap was not used prior to taking the sample and record it on the lab paperwork.
- Do not remove the aerator prior to sampling. Place the opened sample bottle below the faucet and open the cold water tap as you would to fill a glass of water. Fill the sample bottle to the line marked "1000-mL" or to the neck of the bottle and turn off the water.
- Tightly cap the sample bottle and review the sample label and paperwork to ensure that all information is correct and completely filled out.
Results from this monitoring effort and information about lead will be provided to you as soon as practical but no later than 30 days after the system learns of the tap monitoring results.
 Indicates an external site.